How to Plan a Small Flower Bed: Shape, Edge and Planting
A step-by-step way to plan one small flower bed that looks intentional: where to put it, how to mark a simple shape, which edge to choose and how to arrange the plants.
Project at a glance
What you need
- Garden hose or string and pegs
- Grid paper and pencil
- Tape measure
- Spade
- Edging of your choice
- Plants in their pots
- Mulch
One well-planned bed can change a small yard more than a dozen plants dotted around the lawn. The difference between a bed that looks intentional and one that looks like an afterthought is rarely the plants. It is the position, the outline and the edge, all of which are decided before anything goes in the ground.
This tutorial walks through planning a small flower bed from the first look at the site to the final layer of mulch. Most of the work is done with a hose, a pencil and the plants still in their pots, so changes cost nothing until the very end.
Choose the position by sun and by view
Two things decide where the bed goes. The first is light. Watch the yard in the morning, at midday and in the late afternoon, and note how many hours of direct sun the spot gets, since that decides which plants will do well there.
The second is where you will see the bed from. Stand at the kitchen window, the back door and your usual seat. A bed placed in one of those sight lines gets looked at every day. A bed tucked beside the garage does not, however good it is.
If the bed will run beside a path, plan the two together, because they share an edge.
Pick a simple shape
Small beds look best with strong, simple outlines. There are two reliable choices:
- Generous curves. One or two broad sweeps, such as a kidney or a deep arc out from a fence.
- Clean rectangles. Straight edges parallel to the house or the paving, which suit a formal or modern yard.
Avoid wiggly edges. A line of small in-and-out curves looks nervous, is awkward to mow around and makes the bed seem smaller. Avoid very shallow strips too. A ribbon of soil along a fence has room for only one row of plants, so it can never look layered.
As a rough starting point, a depth of about 3 ft (roughly 90 cm) from front to back allows two or three rows of plants at different heights. More is better if you have the room, as long as you can still reach the middle from the edge or from a stepping stone.
Decide on the edge
The edge is what makes a bed look finished, and it keeps lawn from creeping in. Choose it before you dig, since it affects the exact line.
| Edge | Look | Upkeep |
|---|---|---|
| Cut edge (a clean slice into the turf) | Natural, almost invisible | Recut a few times a year |
| Brick | Traditional, warm | Occasional weeding of joints |
| Steel strip | Thin, crisp, modern | Very little once in place |
| Stone strip | Solid, informal | Occasional weeding and resetting |
Pick a material that already appears in the yard, which ties a small space together.
Plan the planting on paper
Sketch the bed outline on grid paper and draw each plant as a circle the size of its mature spread, taken from the label. Circles drawn to size show at once how few plants a small bed really holds, which stops you from overbuying.
Three ideas keep a small bed from looking bitty:
- Limit the cast. Three to five kinds of plant is plenty. More than that and no single plant has enough presence to register.
- Plant in drifts. Set each kind in groups of three or five so they merge into one shape, instead of as single dots.
- Repeat. Use the same plant in two or three places along the bed. The eye links the repeats and reads the bed as one design.
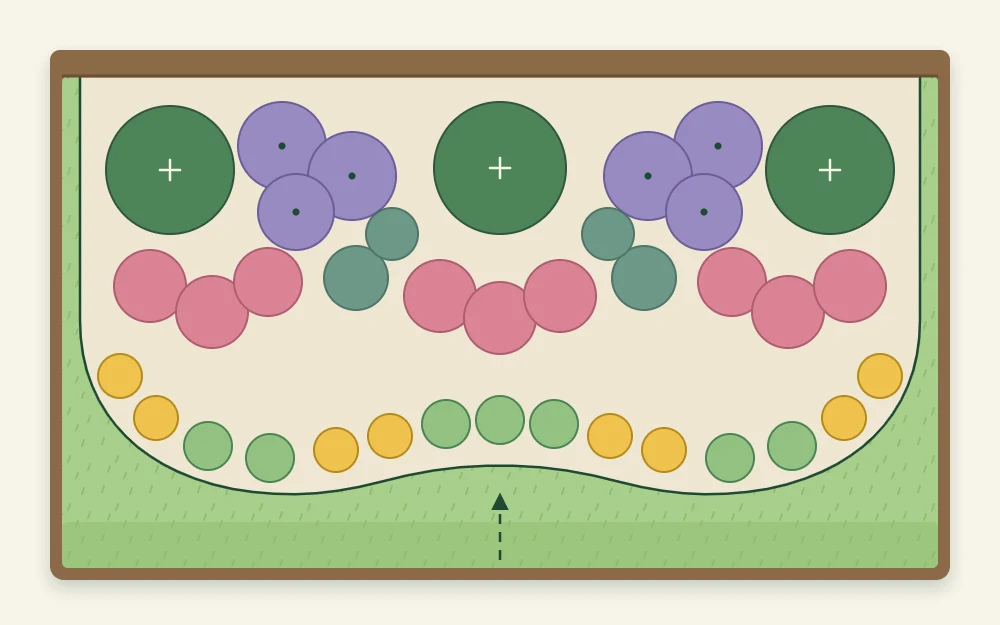
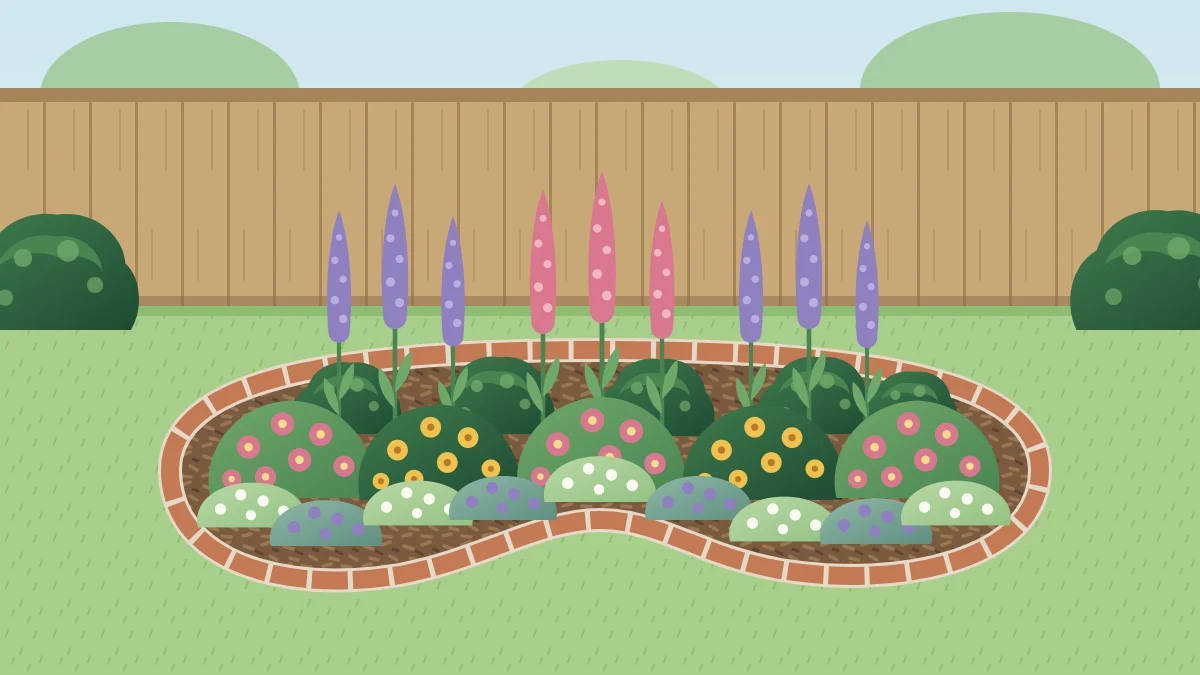
Put the tallest plants at the back if the bed sits against a fence, or in the center if it can be seen from all sides, and step down to low plants at the front edge. The tutorial on layering plants in a small border goes deeper into heights. For choosing the plants themselves, see this guide to picking plants that earn a place in a small garden, and check every choice against the USDA Plant Hardiness Zone Map.
Step by step: from outline to mulch
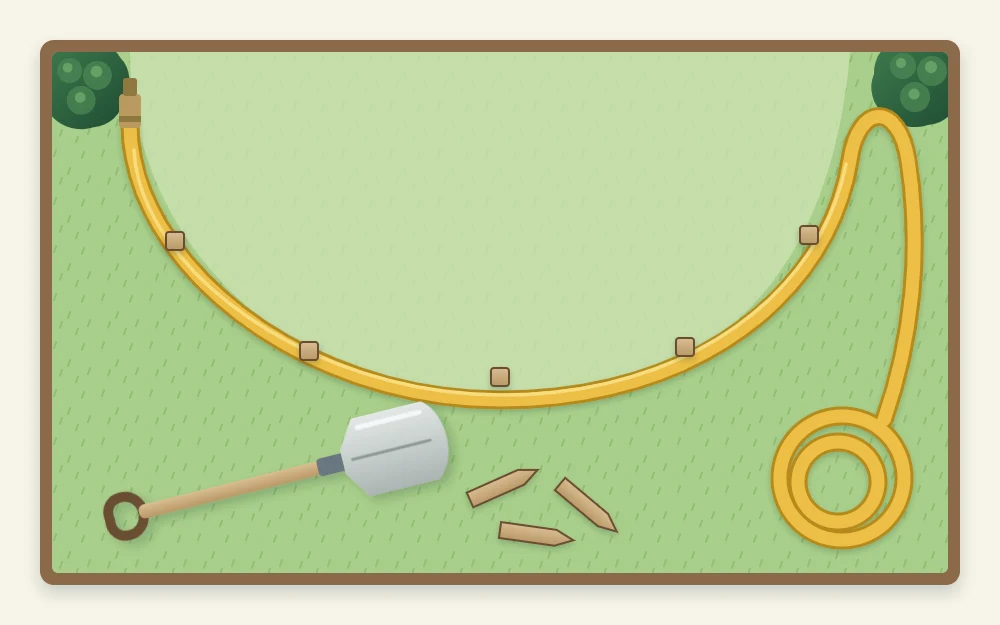
- Mark the outline. Lay a garden hose on the ground for a curved bed, or stretch string between pegs for a straight one. A hose that has warmed in the sun bends into smoother curves.
- Check it from the house. Look at the outline from each window and seat you noted earlier. Adjust until the shape looks right from the main viewpoint, then leave it for a day and look again.
- Call 811. Before any digging, call 811 to have buried utilities marked. Wait for the marks before you go further.
- Cut the edge and clear the bed. Slice along the hose or string with a spade, then remove the turf inside the line and loosen the soil. Install the edging you chose, following the supplier’s guidance.
- Set the plants out in their pots. Stand every plant on the soil where your plan puts it, spaced by its mature spread from the label. The gaps will look too big. They are the room the plants will grow into.
- Step back and adjust. View the arrangement from the house. Move pots until the groups overlap slightly from front to back and no tall plant hides a short one.
- Plant and mulch. Plant each one at the depth it sat in its pot, water it in, and spread mulch over the bare soil between plants, keeping it off the stems.
Tip
If the gaps between young plants bother you in the first year, fill them with annuals. Pull the annuals as the permanent plants spread, and resist adding more perennials.
Common planning mistakes
- Spacing by today’s size. Plants set close for a full look in the first month soon crowd each other.
- A bed too small for its setting. A tiny circle in the middle of a lawn looks lost. One larger bed joined to a boundary or a path reads as part of the layout.
When to do it
You can mark out and plan a bed at any time of year. Planting is usually easiest in spring or early fall, when the soil is workable and the weather is mild, though the right moment depends on your local climate and last-frost dates. If you are working on the whole yard at the start of the season, this spring refresh plan for a small garden shows where a new bed fits among the other jobs.
Good to know
Before buying, check whether any plant on your list is a concern for pets or children, and check local lists so you do not choose one that is invasive in your area.
Frequently asked questions
How deep should a small flower bed be from front to back?
As a rough starting point, about 3 ft gives room for two or three rows of plants at different heights, which is what makes a bed look layered. Shallower strips hold a single row only. Go deeper if space allows, provided you can still reach the middle without stepping on the soil.
How many plants do I need for a small flower bed?
Fewer than you expect. Draw the bed to scale and add a circle for each plant at the mature spread shown on its label. Count the circles that fit. Choose three to five kinds and buy several of each, so they can be planted in groups and repeated along the bed.
Is a curved or straight flower bed better?
Either works if it is simple. Broad curves suit informal yards and soften a square plot, while clean rectangles suit formal or modern spaces and line up with paving. What rarely works is an edge with many small wiggles, which is hard to mow around and makes a bed look smaller.